

Window Tinting in Arlington Heights, IL is easier to plan when you know what happens after you hand over the keys. Automotive tint installation involves more than placing dark film on the glass. Your installer needs to review the vehicle, confirm the film and shade, clean the glass, fit the film, apply it carefully, inspect the finished windows, and explain what to expect while the tint dries.
The first few days matter too. Fresh tint may show temporary haze or small moisture pockets while the mounting solution dries. You may also need to keep your windows closed and avoid cleaning the inside glass for a short period after installation.
At The Detail Dynasty, window tint work takes place from our dedicated garage facility in Skokie, IL & Chicago’s North Shore. If you are coming from Arlington Heights for an appointment, this guide walks through a typical tint installation from arrival through aftercare.
Table of Contents
- Before Your Window Tint Appointment
- Step 1: Confirming Your Vehicle and Tint Goals
- Step 2: Reviewing Film and Shade
- Step 3: Checking Illinois Tint Rules
- Step 4: Inspecting the Existing Glass
- Step 5: Cleaning and Preparing the Windows
- Step 6: Cutting and Fitting the Film
- Step 7: Applying Window Film
- Step 8: Working Around Curved Rear Glass
- Step 9: Final Inspection
- What Fresh Window Tint Looks Like
- Why Fresh Tint Can Look Hazy
- When Can You Roll Your Windows Down?
- When Can You Clean Tinted Windows?
- How Long Does Window Tint Take to Dry?
- What Can Affect Tint Drying Time?
- What Should You Bring on Install Day?
- Tesla Window Tint Near Arlington Heights
- Schedule Window Tinting Near Arlington Heights
- Frequently Asked Questions
Before Your Window Tint Appointment
A little preparation can make Window Tinting in Arlington Heights, IL easier for both you and the installer.
You usually do not need to perform a full detail before bringing the vehicle in, but clearing personal items away from the windows is helpful.
Consider removing:
- Items attached to side glass
- Suction-cup accessories
- Loose items around the rear deck
- Items stored against rear windows
- Window-mounted electronics
- Anything that blocks access to the glass
If your vehicle already has aftermarket tint that needs to come off, mention it before the appointment.
Existing film can add another stage because it may need to be removed before the glass can be prepared for new film.
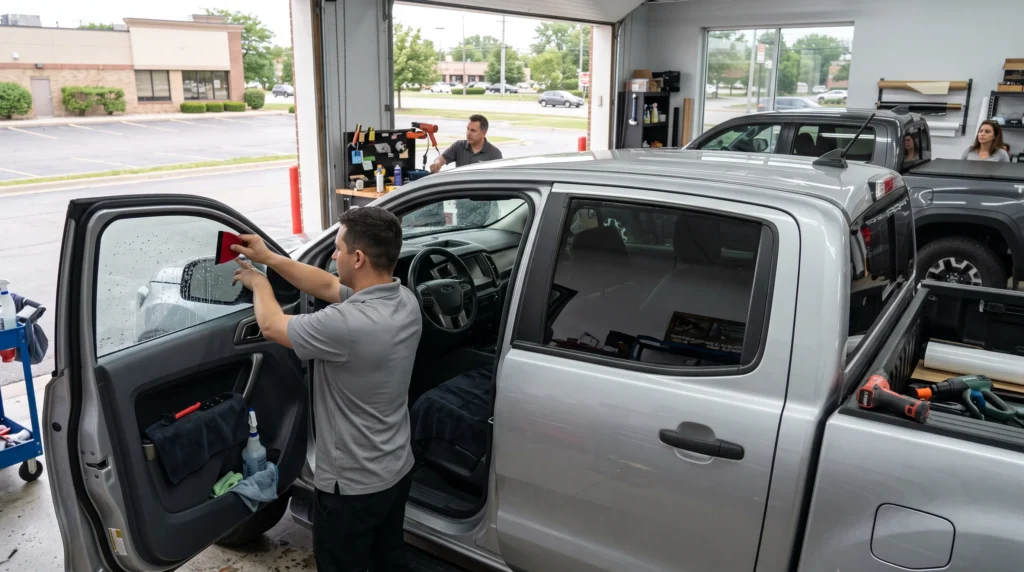
You can review our Window Tint service before your appointment if you want to see how tint fits with The Detail Dynasty’s other vehicle-protection services.
Step 1: Confirming Your Vehicle and Tint Goals
The appointment should begin with the vehicle and what you want from the tint.
Different owners come in with different goals.
You may want:
- Less solar heat
- More privacy
- Reduced glare
- UV protection
- A darker exterior appearance
- A lighter film with strong heat control
- Tint that visually matches rear privacy glass
These goals do not always point toward the same film or shade.
Someone focused on privacy may care more about visible darkness.
Someone focused on cabin heat may care more about the film’s solar-energy and infrared performance.
That conversation should happen before film goes onto the glass.
Step 2: Reviewing Film and Shade
Next comes the film choice.
Window tint percentage is commonly discussed through Visible Light Transmittance, or VLT.
A lower VLT number means less visible light passes through the glass.
A higher VLT number means more visible light passes through.
Common examples include:
| VLT | General Appearance |
|---|---|
| 70% | Very light |
| 50% | Light |
| 35% | Medium |
| 20% | Dark |
| 5% | Very dark |
The completed window may not measure exactly the same as the number printed on the film because automotive glass already has its own light-transmission level.
That is one reason film selection should consider the existing glass.
Darkness and Heat Rejection Are Different
A darker window does not automatically reject more heat.
Film construction matters.
Drivers choosing Window Tinting in Arlington Heights, IL for cabin comfort should compare the heat-control specifications of the film rather than choosing only by appearance.
A lighter high-performing film may fit a driver who wants heat control while keeping the glass relatively light.
Step 3: Checking Illinois Tint Rules
Film selection also needs to fit current Illinois law.
Under 625 ILCS 5/12-503, tinted film generally may not cover the full front windshield. Illinois permits a nonreflective strip along the uppermost portion of the windshield as long as the film does not extend more than six inches downward from the top.
Illinois also sets conditions for the windows immediately next to the driver.
One permitted configuration allows at least 50% light transmittance on those windows when the windows behind the driver’s seat are not treated below 30% light transmittance. Another permits at least 35% light transmittance when none of the rear windows are treated below 35%, subject to the conditions written into the statute.
Factory-tinted rear glass and certain medical provisions are also addressed in the statute.
That means there is no single tint percentage that automatically applies to every window on every vehicle.
The entire glass setup matters.
This section is general information rather than legal advice, and current Illinois law should be checked when your installation is planned.
Step 4: Inspecting the Existing Glass
Before installation, the glass should be inspected.
The installer may look for:
- Existing tint
- Stickers
- Adhesive residue
- Scratches
- Chips
- Defroster lines
- Factory markings
- Contamination
- Damage around seals or trim
This inspection gives both the installer and owner a clearer picture of the starting condition.
A scratch already present in the glass will not disappear when tint is installed.
The same goes for damage to a rear defroster line or marks left from previous film removal.
If old aftermarket film is present, removal may need to happen before the installation can continue.
Step 5: Cleaning and Preparing the Windows
Clean glass is a major part of tint installation.
The film needs to sit against the glass without loose dirt, fibers, or other contamination trapped underneath.
The installer may clean:
- Interior glass
- Window edges
- Areas near seals
- Corners
- Lower glass sections
- Rear-window surfaces
Attention around the edges matters because side windows move up and down through their seals.
Any contamination left near those areas can end up underneath the film during application.
This is one reason The Detail Dynasty performs window tint work indoors at our facility in Skokie, IL & Chicago’s North Shore.
A controlled garage setting provides a cleaner working area than attempting the same installation outdoors.
Step 6: Cutting and Fitting the Film
The film must be shaped for each piece of glass.
Depending on the installation system and vehicle, the installer may work with digitally cut patterns, hand fitting, or a combination suited to the glass.
The goal is to fit the film closely to the visible glass while accounting for seals and moving windows.
Door glass presents one type of job.
A large curved rear windshield presents another.
Small quarter windows create their own fitment challenges.
The final film needs to match the window shape without interfering with normal glass movement.
Step 7: Applying Window Film
Automotive window tint is commonly installed using a mounting solution that allows the film to be positioned on the glass.
Once it is in place, the installer removes the liquid from between the film and glass and works toward a smooth finished surface.
That mounting solution explains something drivers sometimes notice immediately after picking up their vehicle.
The tint may not look completely dry yet.
XPEL states that newly installed automotive tint can show a hazy appearance or moisture bubbles for up to about 10 days while the installation moisture dries. The company says those conditions normally disappear as drying finishes. XPEL Product Care
Fresh tint and fully cured tint do not always look identical.
Step 8: Working Around Curved Rear Glass
Rear windshields deserve special attention.
Unlike many side windows, rear glass can have a large compound curve.
It may also include:
- Defroster lines
- Brake-light housings
- Antennas
- Tight trim
- Large surface areas
Film needs to conform to that curved shape.
The rear window is also one area where aggressive cleaning after installation should be avoided because abrasive tools can damage tint.
When cleaning tinted rear glass later, gentle products and soft towels make more sense than rough pads or brushes.
Step 9: Final Inspection
After installation, the windows should be reviewed before the vehicle leaves.
The installer may inspect:
- Film positioning
- Window edges
- Corners
- Rear glass
- Film around seals
- Overall appearance
- Visible contamination
- Window movement when appropriate
You should also receive aftercare directions.
Those instructions matter because fresh film is still drying and bonding to the glass.
Do not treat a newly tinted window exactly like glass that has had film installed for months.
What Fresh Window Tint Looks Like
Owners are sometimes surprised when they look closely at their tint immediately after installation.
Fresh film can show temporary:
- Haze
- Cloudiness
- Small moisture pockets
- A slightly uneven appearance while wet
These signs do not automatically mean something is wrong.
XPEL says haze and moisture bubbles may remain visible for up to 10 days as installation moisture dries.
Drying conditions differ, so not every installation will clear at the same speed.
Here’s what matters: follow the care instructions and give the film time to dry before judging the finished appearance.
Why Fresh Tint Can Look Hazy
The haze is often connected to moisture used during installation.
Film is positioned while wet, and that moisture needs time to escape.
As it dries, the tint typically becomes clearer.
Temperature, humidity, film type, glass shape, and weather can all affect the process.
That means Window Tinting in Arlington Heights, IL installed during a cold stretch may not dry at exactly the same pace as tint installed during warm weather.
XPEL notes that drying conditions depend partly on climate.
Do not poke, press, peel, or rub moisture pockets in an attempt to make them disappear.
Let the film dry according to the installer’s directions.
When Can You Roll Your Windows Down?
This is one of the most common install-day questions.
The safe answer depends on the film and installer instructions.
3M tells owners not to open or close newly tinted windows for at least 48 hours after installation so the film has time to bond properly. 3M Window Tint Care Guide
XPEL advises waiting roughly 1 to 5 days before rolling windows down or cleaning them, depending on the climate where the film was installed.
Those ranges differ because films and conditions differ.
Follow the instructions supplied for the exact film on your vehicle.
Rolling a window down too early can catch a film edge before the adhesive has settled.
When Can You Clean Tinted Windows?
Fresh tint also needs time before interior cleaning.
3M recommends waiting at least 48 hours before cleaning newly installed tint. The company recommends soft cloths or sponges and says abrasive cleaners should be avoided.
XPEL recommends a slightly damp microfiber towel and, when needed, a mild non-ammonia glass cleaner. It warns against abrasive cleaning materials such as scouring pads.
After the drying period, keep the cleaning routine simple:
- Use a soft microfiber towel
- Avoid abrasive pads
- Avoid harsh scrubbing
- Follow the film maker’s cleaner guidance
- Be gentle around film edges
A tint installation should not need aggressive cleaning products to remain clear.
How Long Does Window Tint Take to Dry?
There is no universal drying time.
Some visible installation moisture may clear quickly.
Other installations can take several days.
XPEL states that haze or moisture bubbles may remain for as long as 10 days while the mounting moisture dries completely.
That does not mean the car cannot be driven.
It means the film is still going through its drying period.
Your installer should tell you how long to keep the side windows closed and when normal interior-glass cleaning can begin.
What Can Affect Tint Drying Time?
Several conditions can change how quickly automotive film dries.
Temperature
Warm conditions can help moisture leave the installation faster.
Cold conditions can slow the process.
Humidity
More moisture in the surrounding air can affect drying.
Window Size
A large rear window may have a different drying pattern from a small quarter window.
Film Construction
Different films can behave differently during installation and curing.
Time of Year
For Window Tinting in Arlington Heights, IL, January and July do not provide the same drying environment.
That seasonal difference is normal.
If you are unsure whether something you see is part of normal drying, contact the installer rather than trying to fix the film yourself.
What Should You Bring on Install Day?
You generally do not need much.
The most useful thing is knowing what you want from your tint.
Before arriving, think about:
- Heat rejection
- Privacy
- Glare reduction
- Appearance
- Nighttime visibility
- Whether you want front and rear glass to look similar
- Whether your vehicle already has factory privacy glass
If you have questions about Illinois legality, bring them up before installation begins.
If another shop installed tint previously, tell your installer.
If the glass has known damage or previous adhesive residue, mention that too.
Clear information at the beginning makes the installation plan easier to understand.
Should You Wash the Car Before Tint Installation?
A spotless exterior is usually not the main requirement for tinting because the film is installed on the inside surface of automotive glass in standard applications.
Still, bringing a vehicle covered in excessive mud or debris is not ideal.
The installer needs access to doors and glass without bringing unnecessary contamination into the work area.
If you are planning more than tint, The Detail Dynasty also offers Exterior Detailing and Interior Detailing.
Can Tint Be Combined With Other Services?
Yes.
Many vehicle owners schedule tint as part of a broader protection plan.
The Detail Dynasty also provides:
If you want several services performed, discuss them when scheduling.
That allows the work to be arranged in a sensible order for the vehicle.
Tesla Window Tint Near Arlington Heights
Tesla owners have many of the same tint questions, but their vehicles can include large areas of glass and model-specific window shapes.
The Detail Dynasty provides dedicated Tesla Window Tint service.
Cybertruck owners can also review our Cybertruck Window Tint page.
Tesla owners can also review:
As with any other vehicle, tint shade and film choice should account for the existing glass and Illinois rules.
Window Tinting in Arlington Heights, IL: What Install Day Really Looks Like
The installation itself follows a logical sequence.
First, decide what you want the film to do.
Then confirm the shade and film.
Review the legal setup.
Inspect and clean the glass.
Fit and apply the film.
Inspect the completed windows.
Then allow the tint to dry without disturbing it.
The first days require the most patience.
Do not roll the windows down earlier than instructed.
Do not clean fresh tint too soon.
Do not press on moisture pockets.
Do not assume temporary haze means the installation has failed.
Proper drying is part of the installation process.
Schedule Window Tinting Near Arlington Heights
If you are planning Window Tinting in Arlington Heights, IL, The Detail Dynasty can help you review film, shade, privacy, heat-control, and vehicle-specific choices before installation.
Our automotive detailing and protection studio is based in Skokie, IL & Chicago’s North Shore.
Before your appointment, tell us what you drive and what you want from the tint. We can discuss the film and window coverage before installation begins.
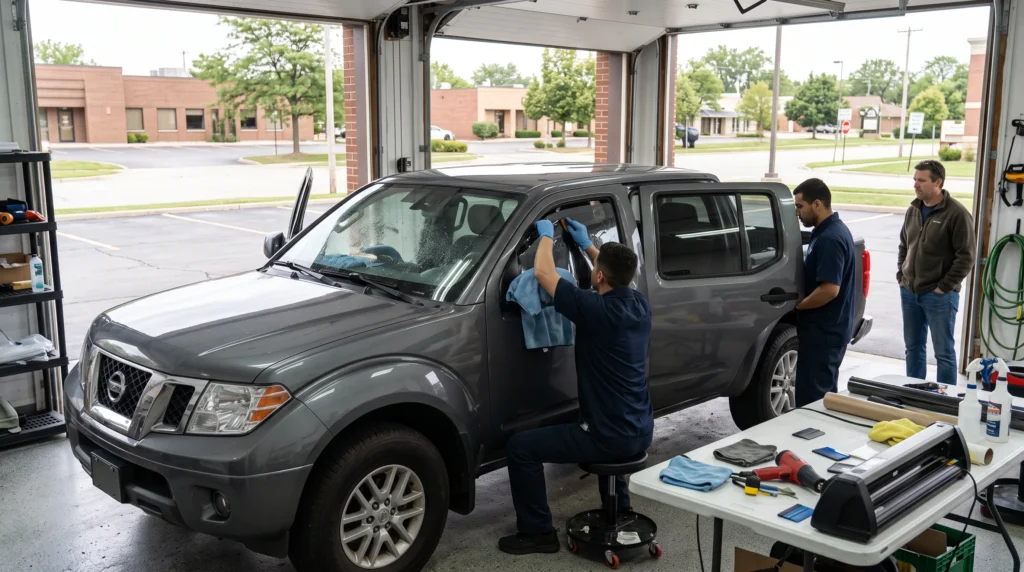
Call (773) 216-3104 or visit our contact page to schedule an appointment.
Frequently Asked Questions
1. How should I prepare my car for a window tint appointment?
Remove accessories and personal items that block access to the glass. Tell the installer if aftermarket tint is already installed or if the glass has known damage. You usually do not need to perform a full detail before tinting.
2. Why does new window tint look cloudy after installation?
Installation uses moisture to position the film. XPEL states that haze or moisture bubbles can remain visible for up to about 10 days while that moisture dries. The appearance should clear as the film dries.
3. How long should I wait before rolling down newly tinted windows?
Follow the instructions for your exact film. 3M recommends at least 48 hours, while XPEL gives a range of roughly 1 to 5 days depending on climate.
4. Can I clean my windows right after tint installation?
No. Fresh tint needs time to bond and dry. 3M recommends waiting at least 48 hours before cleaning. XPEL recommends waiting about 1 to 5 days depending on installation climate.
5. What should I use to clean tinted windows?
A soft microfiber towel and a film-safe cleaner are good choices. XPEL recommends a damp microfiber towel and says mild non-ammonia glass cleaner may be used when needed. Avoid abrasive pads.
6. Can I tint my full windshield in Illinois?
Illinois generally does not permit aftermarket tint across the full front windshield. A nonreflective strip may be installed across the uppermost portion as long as it does not extend more than six inches downward from the top.
7. Where can I get Window Tinting near Arlington Heights, IL?
The Detail Dynasty provides professional Window Tint installation from our dedicated garage facility in Skokie, IL & Chicago’s North Shore. Arlington Heights vehicle owners can call (773) 216-3104 or visit our contact page to schedule an appointment.
Sources
- Illinois Compiled Statutes, 625 ILCS 5/12-503
Publisher: Illinois General Assembly
Publication Date: Current statute accessed October 2026
Used for: Windshield tint restrictions, six-inch upper windshield strip, and side-window rules. - 3M After Installation Product Care Instructions
Publisher: 3M
Publication Date: Not listed, accessed October 2026
Used for: Waiting at least 48 hours before operating or cleaning newly tinted windows and cleaning guidance. - XPEL Product Care Instructions
Publisher: XPEL
Publication Date: Current page accessed October 2026
Used for: Temporary haze, moisture bubbles, approximate 1-to-5-day wait before operating windows, cleaning guidance, and tint drying behavior.
